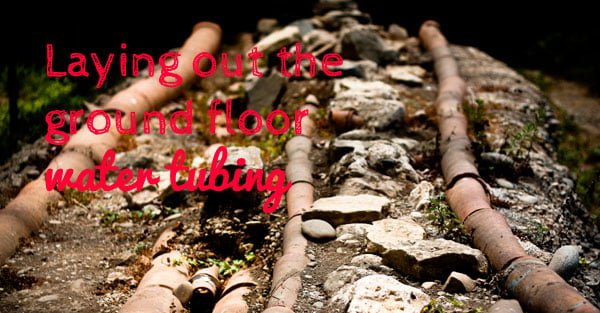
Some things you can’t do yourself. Most things I can. The things I cannot do myself aren’t the easiest ones to write about. So for a change something I did myself again: water tubes!
While roof guy was working his ass of (or was he?), we continued doing our own thing as well. As some of you might remember, we were working towards a new kitchen. We already got rid of the old one a long time ago, destroyed the floor (and then dug a little more) and poured in the concrete. Then something called “preparing for roof guy” intervened, but now we’re back on track! Eyes on the prize, ladies and gentlemen, and with that we lay out the plumbing for most part of the future kitchen, storage and entryway.
What’s going where?
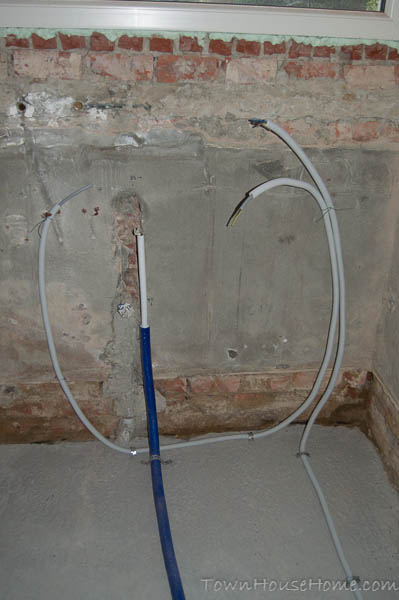
As with the bathroom, I used alupex tubing, all coming together at the central point. Or, depending how you look at it, all starting from the same point. You know, that point where our heater is hanging in the storage room.
For most of the tubes a diameter of 16 mm suffices. Sometimes I used a slightly bigger one of 20 mm though, when I expect that point to have a demand that’s higher than usual. It’ll become clear in a minute. Also quite self-explanatory is the color coding: a red tube delivers hot water, a blue one cold. Or, in case of a radiator, the red tube flows towards the radiator and the blue one away from it. Just so you know.
Kitchen
I started with things going to the kitchen. We’re planning a kitchen with an island, currently with no water on it though. But as you never know what the future might bring, I found it wise to lay down a drain and a supply to the island just in case.
And so I did.

I laid the same tube to the island as I did to the wall against which the sink is coming. I chose to use a 20 mm diameter tube, just to be sure we could use the dishwasher and the sink at the same time. You just never know what you’ll do once your kitchen is finished, right?
Next to that I also laid out a red and a blue tube for the radiator. For that 16 mm diameter suffices.

Storage room
Over here we’ve got some more tubing to lay down. First of all our washing machine will be put in this room, which has its own dedicated tap. Next to the washing machine we’re going to put a secondary sink, for when we need some water (or to fill a bucket for washing the car). That one receives a cold and a hot supply (but it’s not in the picture though). Completely in the corner there’s a tube for an outside tap, so that we can use the hose outside.

Next up a put a red and a blue tube to the outer far corner. This one doesn’t go anywhere (yet), but I have big plans with it. If you look closely on the tour, we have a small side building, which will, eventually, become my tool and building Nirvana. But what good is a Nirvana without any water? None I tell you!
And so I lay the tubes. In 20 mm diameter. Because I have big plans for my Nirvana. Big plans I tell you.

In the other corner there are three tubes there, one red and two blue. The first blue one is for the toilet we’re going to provide in the entryway, in the future. Now before you start to look all funny, we’re going to surround it with drywall and a door as well. It wouldn’t be very funny to have a toilet facing our front door, would it? Just imagine…

The other two are for a very special kind of apparatus. First of all, in this corner the drain from the bathroom comes down. Now, as far as I know, if you’re taking a shower (or a bath), the water going down the drain isn’t really cold. It still holds some heat. Because most people don’t take cold showers (or baths for that matter). I know I’m not the first person to notice, because someone already made all different kind of heat exchangers to minimise this heat loss. So in my mind I want to place a tube heat exchanger here. I still have to do some research and math about ROI and such though, but still, the possibility is here.
I’m all about saving a buck, yo!
Entryway
The first tube in the entryway is a blue one that also goes into what will become our downstairs toilet one day. The toilet itself is already connected, but we’re going to provide a hand washer there. You can’t wash your hands without water though, so here it goes. Next to it are a red and a blue one, for a tiny radiator in the toilet. That way we don’t have to freeze our buts off during the winter when we need to go!

Then we have a plethora of tubes going to the front of the house.

First we have a red and blue pair for the radiator in the entryway.
Then we have a red and blue pair for both radiators in the living room (more on that later, just know that there’s two of them). From an usage point of view those are actually one really big radiator to me, and as such I only provided one pair of tubes here. I did however opt for 20 mm tube, just to be sure.
Another pair of red and blue is going to be used for the radiator in our bedroom upstairs. On second thought this one would have been better across the ceiling. It would have presented other problems, and it’s laid out now, so it’s going to stay anyway.
And the last one is a single blue one, you’ll never guess what it’s for.
Are you ready for it?
Here goes nothing…
Yet another tap, this time on the front of the house. Right next to our front door.
Keeping it all in place
Now that I’ve laid out the complete plan of what is going where, it’s time to get it all in place. After all, you can’t just let them float around on the concrete. Whatever next step, it’s always necessary to get them fixed to the concrete.
For that, I used a knee pad (one of those multi color board things). Concrete can be very hard, just so you know. Then I used my SDS drill and a 6 mm sized drill to drill holes in the concrete. A lot of holes. I drilled a hole roughly every half a meter along the tubes and every two or three tubes. Then in each and every single one hole I had to put one of these things named a plug.
With the plugs in place I cut strips of band iron, just a bit longer than needed, to go nicely over all the tubes, and then I screwed them all in place.
It’s just a matter of “wash-rinse-repeat“. If you scroll back up again, you can see how I did it in some of the photos. Guess you didn’t see that coming, did you?
Final thoughts
Tube. A lot of it. That’s what went into this post. I laid out around 50 meter of red 16 mm, and 60 meter of blue. And then I think around 20 meter or so of both red and blue 20mm. And that’s only for these three rooms. Luckily you don’t need water all over the house…
It has also been one hell of a long post again this time, in contrast to everything roof guy related. There’s a whole psychology behind it (I tend to write more than one post if something takes more than two weeks anyway), but this does leave me with a question: do you like the longer posts like this one, or the shorter ones like roof guy’s? Please enlighten me in the comments.