Now that we have plumbing, drains and all other kind of tubing in place, it’s time to start putting things in place. We decided to start with the toilet, as there was going to be a wall next to it, dividing it from the shower, so we could tackle those two at the same time, separately from the shower and all the other stuff. As you might recall from looking at our sketch, I deliberately chose a wall hung toilet there. We both like the (luxurious) look a hung toilet gives, and it also has some advantages (like the ground underneath being free, easier to keep clean). It also has it’s disadvantages though: it’s not as easy to install, and you’d better pray that nothing goes wrong with it technically once installed (ok, you should be able to get everything done through the hole for the flush buttons, but still…). The second part I have no experience with (yet, and I keep praying every day that it will not happen that day as well). The first part, well, that’s what I’m writing this post for. Ladies and gentlemen, how to install a wall hung toilet the TownHouseHome way!
First of all, when you go to the store and buy a wall hung toilet, you get a giant box which you can barely lift by yourself. It’s not really that heavy, it’s just the combination of heaviness and immensity that makes it ungainly and really hard to handle on your own. But that’s not the end of it: after you make it all the way through man-handling it in the store to get it from the shelve (or the floor) into (make that onto) your cart, struggling with it to get it into your car on the parking lot (I so badly need a van, SUV or pickup truck for these things), struggling even more with it to get it out of your car back home and then some to get it inside, you’re still nowhere. Applaud yourself though, you now have a giant box in your entryway. Next you open up the box, and out come a million pieces that need to be put together to form your toilet!
Ok, maybe, just maybe I exaggerated a bit. It’s only a thousand pieces or so, and you get a schematic of how to assemble the thing, in 36 steps. So, 36 steps later you get this:
Yes, that’s the frame for my toilet, lying on the floor, ready to be put against the wall. Woohoo, tackled that one nicely!
So, with the frame ready it was time to start with the wall made of drywall that is going to house the frame, and at the same time, the wall dividing the toilet from the shower, so you can sit on the toilet in private. First thing first, we need a frame for the drywall, and made that out of metal studs. Start with a piece of metal stud on the floor where the toilet housing wall will be, this way we knew where the dividing wall exactly came. Next we put up a metal stud against the wall, getting it perfectly level, as starting ground for that dividing wall:
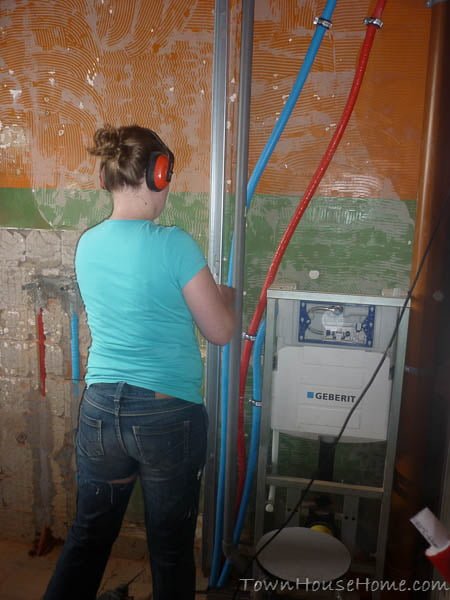
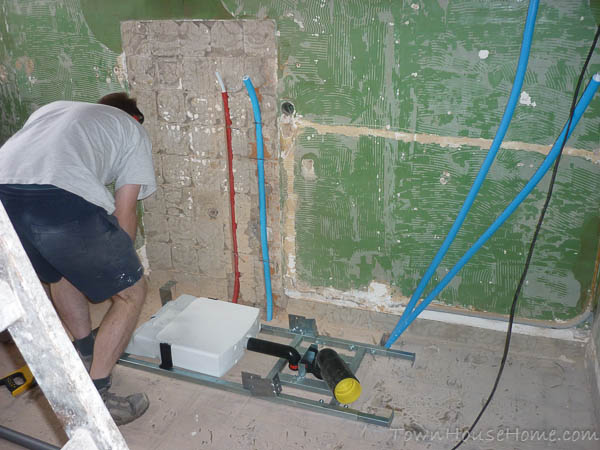
Yes I had to include this photo, as it shows that I’m not the only one doing all the work. No it’s not staged, how dare you even think of that! Chrisje is working on fixating the red and blue alupex tubes, so they won’t move when water starts or stops flowing to the to-be bathroom above.
Now it’s time to start the frame in metal studs for the dividing wall, again putting them all level in all possible directions:
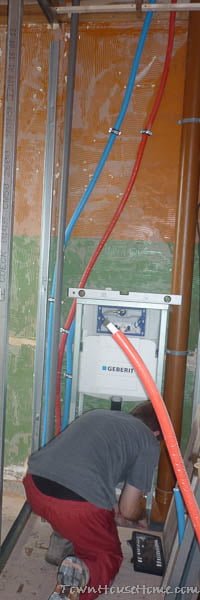
We did that first to minimize the risk of accidentally hitting the toilet frame and breaking something in the process. I then started putting the toilet in place: drill holes in the floor, bolt it to the floor with the hex bolts provided, adjust the height to the height we wanted, drill holes in the wall for the four supports, bolt it to the wall, making sure everything was level once more in all directions. And then it hit me: I forgot to put on the drywall this side of the dividing wall while I still had all the space! Some curses were expressed, and then I decided to just stuff it in between, as it had already taken too long to get the frame just right:

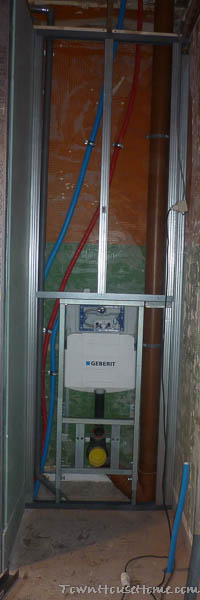
Eventually it all turned out fine, and we could continue (and yes, another stud was placed in the middle of the dividing wall as well, however that’s not shown on the pics). So with the drywall on that part of the wall, it was time to finish the metal stud frame for the toilet wall, which is screwed onto a stud in the dividing wall as well, so they stick together sturdily. Once that frame was finished, it was just a matter of throwing some drywall to it, then some screws and hope everything keeps sticking! Before you start throwing, don’t forget to connect the alpex tube to your toilet reservoir though (otherwise you won’t get it to fill with water and hence your toilet will never, never ever flush).


As we were planning to tile the whole thing, no time was needed to fill all the joints and make them perfect, the only thing left to do was cutting a plate to serve as a temporary tile. As we still had to install all the other stuff in the bathroom, tiling wasn’t for the very near future. However, as we didn’t have a toilet inside the house, we were quite desperate to get this one working as soon as possible, hence the temporary tile. Turns out the drywall had the same thickness as the tile that was going on and some tile glue. The last steps were cutting the tubes to and from the porcelain (the two yellow caps on the photo to the left above) the right length, screw the toilet pot in place and put the lid on, et voilà!
Now take it all off again, unscrew the lower half of the drywall, and reinforce the part that’s keeping the drain in place. Because when I pushed the toilet drain in place, I also pushed that drain out of it’s support. I found out the hard way the support provided is sketchy, to say the least. The horror, the frustration, you cannot believe! So I clicked the drain back in, and then wound some metal wire around it, so it couldn’t pop out anymore. Put everything back in place, and now you can push the toilet drain perfectly in, and then the toilet pot itself, which also took some tries to get it on…
But in the end it all worked out, I learned a lot about wall hung toilets so that the next one should be a breeze (now I know I’ll just get even more misery with that one). The very first real, visible, usable step had been set, and we were thrilled!